
So you’ve decided to create your own mobile game. You’ve downloaded Android Studio from the official website, and now you’re ready to install it on your Windows 7 computer. What’s next? The installation wizard! Here are a few things you’ll need to get started:
Installation process
If you have recently purchased Android Studio, you can start the installation process from the official website. Once the installation process has been completed, you can move the setup file to the Android studio directory. The next step is to install the Android SDK components. Follow the instructions on the setup wizard. You will find the files you need to create your first project in Android Studio. This will take some time depending on your internet connection. Once you have completed the installation process, you can start using the new software.
First, you will need to download Android Studio. Once downloaded, run the installation wizard. After the installation is complete, you can start developing your first app. After that, you can select the templates you want to create. When you have finished downloading and installing Android Studio, you will see the “Setup Wizard” window. Click Next. The setup wizard will ask you a few questions about the installation process. Once you have answered the questions, the process should be very simple.
Requirements
Before you begin installing Android Studio on Windows 7, it is essential that you first install the Android SDK. You can access the Android SDK tools from the Android Studio environment or from the command line. To install the SDK, you must first add it to the PATH environment variable. You can add the environment variable through the Advanced System Settings link and click the Environment Variables dialog. After you have completed this, you can now run Android Studio.
To install Android Studio on Windows 7, you need to download the latest version. You can download the 32-bit or 64-bit version of the software. When you download the installer, make sure to choose the x86 version. If you’re using Windows 7, you must install the Android x86 SDK instead. Once you have installed the SDK, you can then install Android applications on Windows. To install Android applications on Windows, you will need a program called Bluestacks App Player.
Installation wizard
After installing Android Studio on Windows 7, you can begin developing with your new development environment. In order to make use of the new development environment, you will need to download the latest version of the Android SDK. Once you have downloaded the latest version, you can double-click on the installer to start the installation. During the installation, you will be asked to select the installation location, and to select a shortcut for Android Studio.
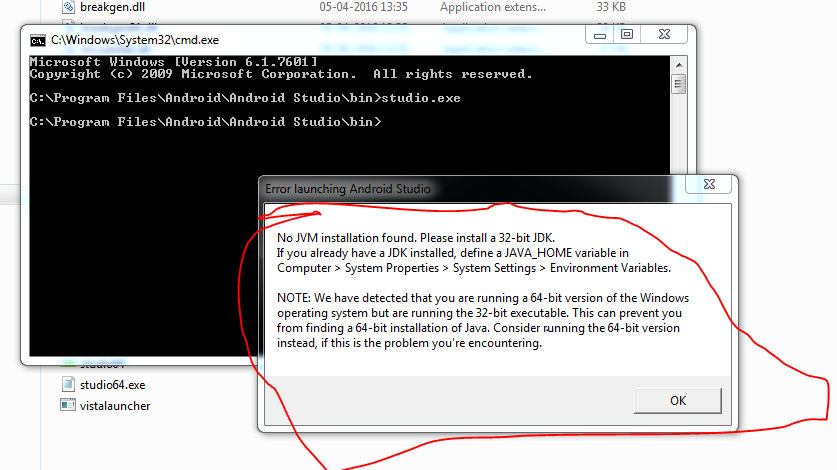
If you don’t have the latest version of Java, you can still use Android Studio to create your own apps. It has an installation wizard that helps you install various components. The installation process can be lengthy, depending on your Internet connection. If your computer doesn’t already have Java installed, you can use an older version of Java to install the program. The setup wizard will also let you know which versions of Android Studio you should install.